See, originally I planned to show you how to make your own pretty Dry Erase Message Board - for the fridge! So I spent all day Saturday working on it, but not quite finishing all the examples. In an office chair we got for free from The Hubs' office. That they were getting rid of because it hurt people's backs.
See where this is going? *sigh* My back is broked. For the 3rd time since he brought it home - I seriously cannot sit in that chair for longer than 30 minutes without my back being WRECKED for the next few days. It sucks. Who knew a chair could be so awful? I know it sounds crazy, but seriously, the chair is the only connecting factor to the recent rash of back incidents. (This weekend we're going shopping for a new chair for me so I may craft my little heart out comfortably.)
So, I don't have the Dry Erase Board done just yet. Next week, most likely. BUT, I do not arrive empty-handed! I just moved up my craft plans a week.
Today, instead, I present the super-easy Photo String! Seriously, it's ridiculously easy.
Materials:
- thin ribbon or transparent beading monofilament
- push pins
- binder clips (splurge a little and get some cute, colorful ones!)
- photos of various sizes that you would like to hang.
Steps:
- Measure out how long you want the ribbon or beading monofilament to be (3'-3.5' should be good for starters); hold it up to the wall and see if that's long enough for you.
- If using ribbon, pin the ends to the wall with push pins, allowing the ribbon to drape slightly (you don't want it taut). If using the clear beading monofilament, double-knot the monofilament ends around the push pins, as pictured below:
3. Using the binder clips, attach the photos to the ribbon/bead monofilament! If using medium-size binder clips, you might want to make sure the clip also clips a little of the string/ribbon to keep the photo in place. (If you don't care about the pics sliding around, then don't worry!
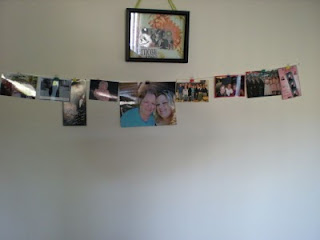
My version of the Photo String using ribbon:
The framed art above the photo string was made by my mom!
It's hard to see ('cuz I like the push pins to blend into the wall a little), but I actually used 3 pins and created a > -shape, and pinned it above my craft desk to use as a photo strip/ inspiration board (hence the torn-out magazine pages). I need to make a bigger one. xD See below:
The charming young boy in the middle is my baby brother, Matthew. He's 18 now, but what's the point of having a blog if you can't humiliate your family members a little? ;D
I like how it looks like the pictures are floating by using the clear monofilament as the base. It's admittedly a little trickier to use the bigger binder clips, though, but I LOVED these binder clips (found them at Michael's in the dollar bins!).
That's it! Easy, it looks neat-o (esp. if you vary the sizes of the photos you're using), and it's easy to change up the photos - all you do is un-clip 'em!
Have fun! Next time I post a craft, it WILL be the Dry Erase Board, I swear. If you want to get the materials in advance, check out this post for the materials needed!


